You might not think about your bathroom fan regularly, but when it stops working, the effects can be quite unpleasant. A non-functioning fan can lead to moisture build-up, mold growth, and unwanted odors, disrupting your bathroom’s comfort and safety. With the right guidance, troubleshooting a bathroom fan doesn’t have to be a daunting task, and understanding the wiring and motor issues is crucial for timely repairs.
- Identify the telltale signs of a malfunctioning bathroom fan to ensure prompt action and maintain a healthy environment.
- Discover how to safely inspect your bathroom fan’s wiring to pinpoint common electrical failures like loose wires or faulty switches.
- Learn the process of diagnosing common motor problems, helping you decide whether repair or replacement is necessary for seamless fan operation.
- Explore essential tools and preventive maintenance tips to keep your bathroom fan running efficiently and prolong its lifespan.
By delving into this comprehensive guide, you’ll gain the confidence to tackle bathroom fan issues head-on, ensuring a well-ventilated and pleasant space for your daily routines.
Identifying Problems: When Your Bathroom Fan Stops Working Properly
A malfunctioning bathroom fan can lead to a plethora of issues, including increased humidity and potential mold growth. Recognizing the signs of a faulty fan is crucial to maintaining a healthy bathroom environment. Often, one of the first indications of a problem is unusual noises coming from the fan, such as rattling or grinding sounds. These noises typically point to mechanical issues that may require immediate attention.
Another common sign is reduced airflow. If you notice that your bathroom remains foggy for longer periods after a shower, or if there are lingering odors, it can be a signal that your fan is not properly ventilating the space. Additionally, if your fan fails to turn on at all, this is a clear indication of an electrical failure that needs troubleshooting.
Addressing these issues promptly is essential for preventing more severe problems down the line. By ensuring your bathroom fan is working efficiently, you promote better air quality and protect your home from moisture-related damage.
Inspecting the Bathroom Fan Wiring: Identifying Common Electrical Failures
Before diving into any electrical inspection, safety is paramount. Always switch off power to the fan at the circuit breaker to prevent any risk of electric shock. Once you have ensured safety, proceed to inspect the fan’s electrical connections and wiring.
Loose wiring within the fan can lead to inconsistent performance or complete failure. Check for any wires that are disconnected or wobbly. Secure any loose connections firmly and ensure that all wire nuts are properly twisted and fastened.
Another area to examine is the switch operating the fan. A faulty or unresponsive switch can often be the culprit. Replace any defective switches and verify that all associated wiring is intact and correctly installed.
Lastly, investigate the circuit breaker and fuses. A tripped breaker or blown fuse could mean an overload in the circuit. Reset the breaker or replace the fuse as necessary. This thorough inspection can help identify the root of the fan’s electrical failures and guide you in restoring its functionality.
Diagnosing the Motor: A Comprehensive Bathroom Fan Not Working? Wiring and Motor Testing Guide
Understanding how to correctly diagnose your bathroom fan motor is crucial if you want to keep your bathroom well-ventilated and free from moisture-related issues. A faulty fan motor often leads to insufficient air circulation, which can encourage mold growth and increase humidity levels.
To begin, always start by turning off the power supply to the bathroom fan through your home’s circuit breaker to ensure safety during the inspection. Once the power is cut, access the fan by removing the cover. Carefully detach the motor using a screwdriver, being cautious to note how the wiring connects to the unit.
Testing the motor involves a few straightforward steps. First, visually inspect the motor for any obvious signs of wear or damage, such as burnt smells, corrosion, or loose connections. If everything appears normal, use a multimeter to check for continuity in the motor’s coils, which helps determine if the motor windings are intact.
A lack of continuity usually suggests that the motor has failed and requires replacement. If the motor shows continuity, it may still malfunction due to mechanical issues like a seized bearing. At this stage, decision-making becomes critical: evaluate whether repairs are feasible or whether obtaining a new motor would be more cost-effective.
Understanding the symptoms of motor issues, such as unusual noises or the fan refusing to start even when powered, can aid in accurately diagnosing the problem. Accurately diagnosing and addressing these problems promptly will enhance your bathroom’s ventilation and comfort.
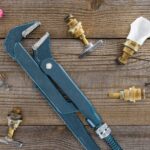
Tool Recommendations: Essential Gear for Testing and Repairing Bathroom Fans
Having the right tools at your disposal is essential for diagnosing and repairing your bathroom fan effectively. These tools not only ensure your work is precise but also make the repair process more efficient.
A multimeter is indispensable for testing electric connections within the fan and checking motor continuity. It helps detect electrical faults, allowing you to pinpoint issues such as circuit breaks or short circuits in the motor.
A range of screwdrivers is necessary for removing the fan cover and motor assembly. Ensure you have both Phillips and flathead screwdrivers, as fans use a variety of screw types.
For safety and practicality, always include insulated gloves in your toolkit. They provide necessary protection against electric shocks, especially when handling electrical components.
An electric contact cleaner is beneficial in maintaining electrical connections, removing dust and corrosion that can lead to poor performance or failures. It’s a non-conductive solution that keeps connections clean without causing damage.
Finally, a flashlight or portable work light ensures proper visibility in the often dimly lit ceiling spaces where bathroom fans are installed. Good lighting is key to identifying issues accurately.
By equipping yourself with these essential tools, you can confidently approach the task of testing and repairing your bathroom fan, ensuring it remains in top working condition.
Preventive Measures and Maintenance Tips for Long-lasting Fan Performance
Maintaining your bathroom fan properly is crucial to ensuring it operates efficiently and prevents future breakdowns. Regular maintenance not only enhances the fan’s lifespan but also supports better air quality and ventilation in your home.
Here are some strategies to keep your bathroom fan functioning at its best:
Regular Cleaning: Dust and debris accumulation can obstruct your fan’s function. Remove the fan cover and clean it with mild soap and water. Use a vacuum or a slightly damp cloth to eliminate dust from the fan blades and motor area.
Inspect Wiring: Periodically check the fan’s wiring. Loose connections can lead to inefficiencies or motor failure. Ensure all electrical connections are secure, and take action if you notice wear or damage on the wires.
Lubricate Moving Parts: If your fan makes unusual noises, it may require lubrication. Carefully apply light machine oil to the moving parts to ensure smooth operation.
Test Fan Functionality: Run the fan after cleaning and inspections to verify its performance. It should start without issues and maintain a consistent sound without interruptions or grinding noises.
Check Ventilation Pathways: Ensure the vent ducts are clear. Blocked ducts can reduce fan efficiency, resulting in inadequate moisture removal from your bathroom. Clean or replace ducting if needed.
Replace Worn Out Parts: Keep an eye on the condition of the fan’s components. Worn-out blades or electrical parts can degrade performance. Consider replacing any faulty parts promptly to avoid complete fan breakdown.
By following these preventive measures and regular maintenance tips, you maintain optimal bathroom ventilation and extend the lifespan of your fan. For even more efficiency, schedule periodic professional inspections to ensure your system is running smoothly and effectively avoiding potential emergencies.
Frequently Asked Questions about Bathroom Fan Troubleshooting
Why is my bathroom fan making unusual noises?
Loose parts, debris, or motor issues often cause noise. Tighten screws and clean the fan to resolve it.
How can I tell if my fan’s motor is faulty?
Check for unusual sounds like humming without spinning, overheating, or the fan not working at all.
What tools do I need for troubleshooting my bathroom fan?
- Multimeter
- Screwdriver set
- Voltage tester
- Screwdriver set
How often should I perform maintenance on my bathroom fan?
To ensure efficiency, inspect and clean your fan every six months, checking for dirt and wear.
What should I do if the fan’s wiring seems damaged?
Switch off power supply immediately and consult a qualified electrician to avoid electrical hazards.