Ensuring your home’s roof remains leak-free is essential for comfortable and worry-free living. A critical component often overlooked in protecting your roof—and entire plumbing system—is the proper installation of plumbing vent boots with accurate roof flashing techniques. This article delves into the intricacies of this process, offering insights that can save you time, resources, and potential frustration.
- Choosing the Right Materials: Discover the best materials that guarantee a durable seal against weather elements.
- Step-by-Step Installation Guide: Follow a detailed walkthrough showcasing techniques for a professional and waterproof finish.
- Common Mistakes and Solutions: Learn how to avoid frequent errors and maintain an efficient, leak-free venting system.
By mastering the installation of plumbing vent boots with proper flashing methods, you safeguard your home against potential water damage while ensuring the lasting performance of your plumbing and roofing systems. Take this opportunity to engage with the detailed strategies shared herein, and perhaps contribute your own tips or experiences for achieving optimal results.
Choosing the Right Materials for Plumbing Vent Boot Installation: Proper Roof Flashing Methods
Selecting the right materials for plumbing vent boot installation is crucial to achieving a long-lasting and effective seal. This process prevents water infiltration and damage to your home’s infrastructure. Understanding the types of materials available can make a significant difference in the overall durability and performance of the roof flashing system.
Lead-Based Plumbing Vent Boots: Renowned for their malleability and ease of installation, lead-based boots conform well to different roof profiles. Their longevity and natural resistance to the elements make them a popular choice, although environmental concerns have led some to seek alternatives.
Rubber and Thermoplastic Boots: Offering flexibility and ease of use, these boots are ideal for DIY enthusiasts. They are available in a variety of sizes to accommodate different vent pipe diameters. When properly installed, they provide a reliable and all-weather seal.
Aluminum and Galvanized Steel Flashing: Both materials offer robust protection against water intrusion. Aluminum is lightweight and corrosion-resistant, while galvanized steel provides added strength and durability. These materials ensure the plumbing vent boot’s integrity under harsh weather conditions.
Choosing high-quality materials tailored to your specific roof type and environmental conditions is fundamental. Not only does it ensure the effectiveness of the installation, but it also contributes significantly to reducing ongoing maintenance needs.
Step-by-Step Plumbing Vent Boot Installation Guide
Embarking on a plumbing vent boot installation project requires patience and meticulous attention to detail. Following a structured process ensures a professional and watertight finish.
Begin by preparing the necessary tools and materials. This includes your selected vent boot, a reciprocating saw, roofing nails, sealant, and a utility knife. Ensure safety gear is worn throughout the procedure.
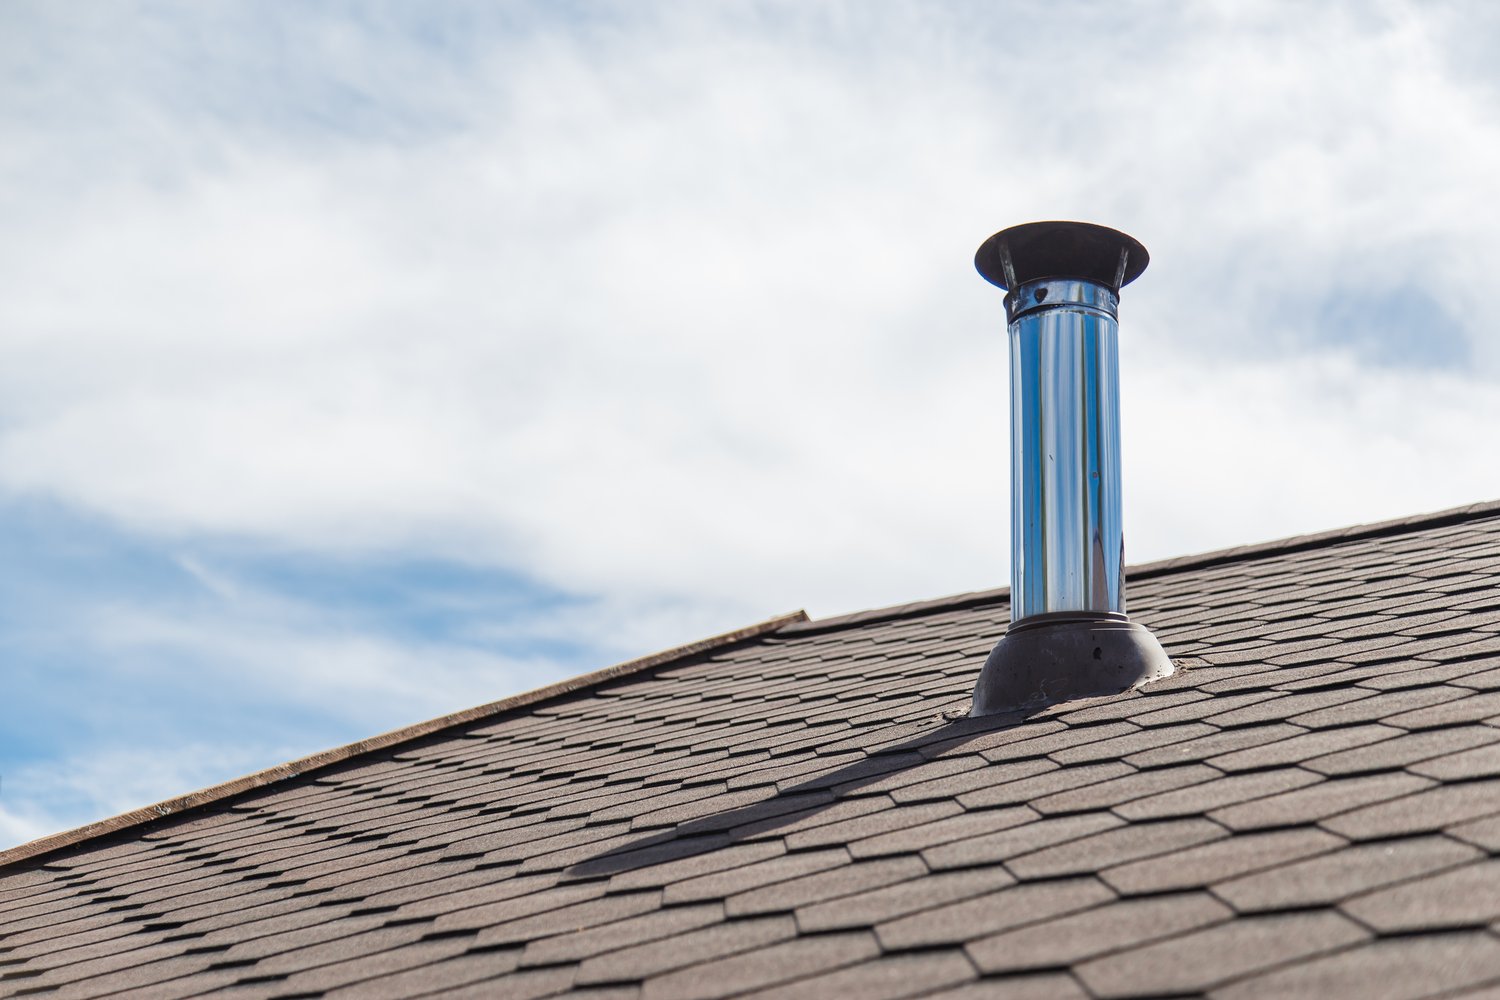
Carefully cut around the existing vent pipe opening in the roof with the reciprocating saw to create a snug fit for the new vent boot. Gently slide the boot over the pipe, ensuring that it sits flush against the roof surface.
Position the flashing and secure it with roofing nails, driven into the upper corners. The lower edges should remain unattached to allow for thermal movement but must sit flat against the roof. Apply a generous bead of sealant around the edges of the vent boot to create a moisture-resistant barrier.
Finally, check for any gaps or potential entry points for water, ensuring the new installation is completely sealed. This meticulous installation approach helps maintain a roof’s integrity, preventing leaks and prolonging the life of both the roofing and plumbing systems.
Common Mistakes and Solutions in Plumbing Vent Boot Installation: Proper Roof Flashing Methods
Plumbing vent boot installation is a critical procedure that demands precision to ensure a leak-free and efficient plumbing system. However, certain common mistakes can compromise the integrity of the installation. Recognizing these errors and understanding how to resolve them is essential for both novice DIY enthusiasts and seasoned professionals alike.
Mistake 1: Incorrect Size Selection
One prevalent mistake is choosing the wrong size for the plumbing vent boot. An improperly sized boot can lead to inadequate sealing, allowing water to seep through.
Solution: Always measure the diameter of the vent pipe accurately. It’s crucial to select a vent boot that snugly fits the pipe size to ensure a secure and watertight fit.
Mistake 2: Inadequate Sealing of Flashing
Another frequent oversight is the failure to properly seal the flashing around the plumbing vent boot. Insufficient sealing leads to potential water infiltration, which can cause roof leaks and water damage.
Solution: Use high-quality roofing sealant or caulk specifically designed for roof flashing. Apply it generously around the edges of the flashing to create a robust barrier against moisture.
Mistake 3: Incorrect Flashing Overlap
Improper overlap between overlapping flashing layers can disrupt the water-shedding capability, resulting in potential leaks.
Solution: Ensure that flashing layers overlap correctly, with the upper section always over the lower, guiding water away from the vent pipe efficiently. This technique helps direct water runoff outward and away from the boot.
Mistake 4: Neglecting to Secure the Vent Boot Properly
A loosely secured vent boot can be easily displaced by wind or other external factors, leading to gaps through which water can pass.
Solution: Use roofing nails or screws to firmly anchor the vent boot to the roof decking. Ensure the fasteners are strategically placed and secured tightly to withstand environmental forces.
Understanding these common mistakes and their solutions ensures a reliable and watertight plumbing vent boot installation. By taking these precautions, homeowners and professionals can prevent costly water damage and ensure the efficiency of their venting system for years to come.
Frequently Asked Questions about Plumbing Vent Boot Installation
What materials are best for a plumbing vent boot installation?
Durable rubber boots and galvanized metal flashing are recommended for longevity and resistance to weather elements.
How important is the flashing in vent boot installation?
Flashing prevents water penetration and ensures a waterproof seal around the vent pipe. It’s crucial for preventing leaks.
Can I install a plumbing vent boot myself?
Yes, with the right tools and guidance, DIY installation is possible, but professional installation is recommended for best results.
What are signs of a faulty plumbing vent boot?
Signs include water stains, mold around the roof area, and visible cracks or damage to the vent boot.
How often should plumbing vent boots be inspected or replaced?
Regular inspection every three to five years is suggested, with replacement as needed based on wear and tear.