Ensuring the correct installation of a P-Trap is more than just a routine task—it’s a critical component for maintaining a healthy, efficient plumbing system. Errors in assembly can lead to unpleasant odors and costly leaks, turning straightforward maintenance into a disruptive problem. Understanding the intricacies of P-Trap installation not only ensures compliance with plumbing codes but also enhances the overall longevity and functionality of your plumbing systems.
- Proper P-Trap assembly is essential for effective waste drainage and odor control.
- Following a step-by-step process can help avoid pitfalls and ensure leak-free connections.
- Adherence to local plumbing codes is crucial to preventing potential violations and their consequences.
Armed with this guide, you’re prepared to make informed decisions and execute precise installations that not only meet but exceed code requirements. Dive into the specifics to master P-Trap installation, securing both the efficiency and compliance of your plumbing system.
The Role of Sink Trap Installation: Proper P-Trap Assembly for Code Compliance
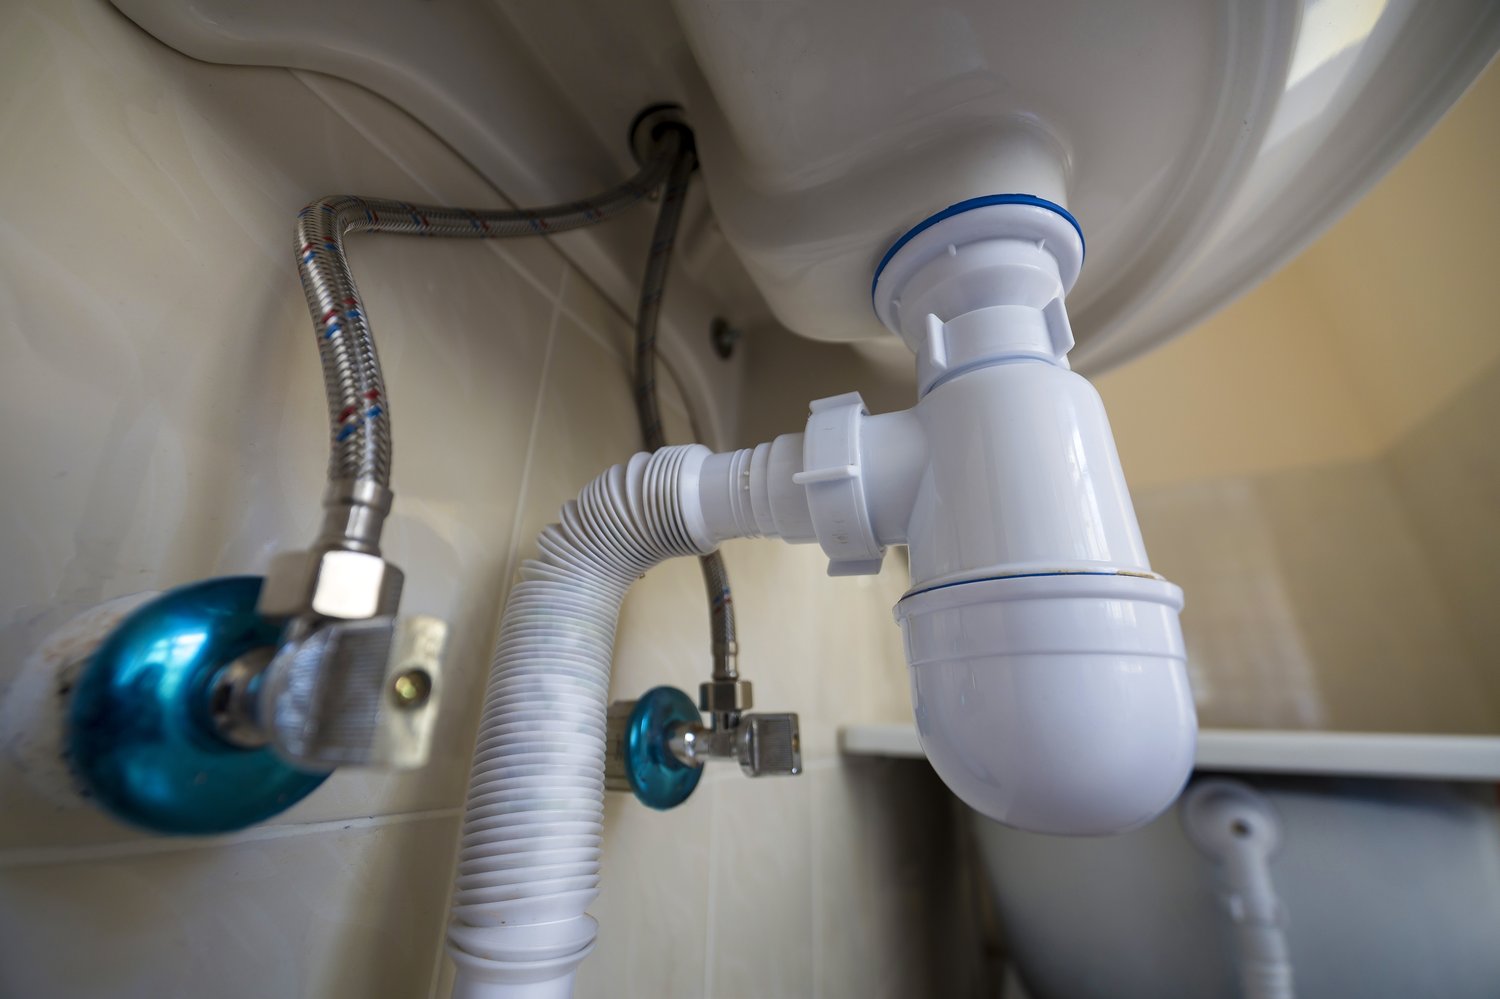
Proper P-Trap assembly is crucial in any plumbing system, ensuring optimal waste drainage and effective control of unpleasant odors. This vital component under the sink works as a barrier, trapping unwanted sewer gases with a water seal. By maintaining a water barrier, the P-Trap not only promotes hygienic conditions but also enhances home safety.
Understanding the basic components of a P-Trap assembly is the first step towards achieving compliance. Typically, this includes a curved section of pipe and associated fittings that connect the sink to the drain. Ensuring each part is correctly assembled is fundamental in allowing efficient wastewater flow away from fixtures while preventing backflow or leaks.
Adhering to plumbing code requirements is essential for code compliance in sink trap installation. These codes dictate specific dimensions and angles, ensuring a standardized approach to plumbing installations. Non-compliance can lead to inefficient drainage systems or more severe problems, such as sewer gas infiltration. Hence, understanding and implementing code-compliant P-Trap installations is not only best practice but a vital part of maintaining plumbing integrity.
Key Steps in Assembling a P-Trap
Assembling a P-Trap correctly involves several critical steps that ensure a secure and leak-free connection. Begin by gathering the necessary tools such as a wrench, plumber’s tape, and the appropriate P-Trap kit that matches your plumbing diameter. Precision and attention to detail during this process cannot be overstated.
Begin by connecting the trap adapter to the sink’s tailpiece. Ensure that the slip joint nuts and washers are properly aligned to avoid leaks. Next, attach the curved section of the P-Trap, ensuring the bend aligns with the drain outlet. This alignment is key to preventing potential drainage issues.
Avoid common pitfalls like overtightening, which can crack pipes or misalign components. Instead, secure connections firmly but gently, ensuring the nuts are snug to prevent leaks but not applying excessive force. Utilize plumber’s tape on threaded connections for an extra seal, enhancing long-term reliability.
Finally, test your assembly by running water and checking for any leaks. This ensures each connection is secured, providing peace of mind that your P-Trap assembly is both functional and compliant.
Ensuring Code Compliance with Sink Trap Installation: Proper P-Trap Assembly for Code Compliance
In the world of plumbing, adhering to building codes is essential for ensuring safety, efficiency, and functionality. Proper P-Trap installation is crucial not only for effective drainage but also for meeting local plumbing codes that maintain plumbing system integrity.
Each area may have specific regulations, so consulting your local authorities or a plumbing professional ensures compliance. Typically, these codes govern aspects such as the P-Trap’s size, material, and placement, ensuring that all components are up to standard.
Regular checkpoints by inspectors often focus on elements like proper alignment to the drain system, adequate sealing to prevent leaks, and sufficient access for future maintenance. Non-compliance with these standards could lead to costly fines, increased risk of failures, and potential health hazards due to wastewater exposure.
Failure to adhere to code can not only lead to operational disruptions but also significant repair costs. Therefore, staying informed about these guidelines is vital for both residential and commercial property owners. By ensuring that installations meet said codes, one can avoid these pitfalls and enhance the efficiency and safety of their plumbing systems.
Frequently Asked Questions on P-Trap Installation
What is the purpose of a P-Trap?
A P-Trap prevents sewer gases from entering your home by trapping a small amount of water in its curve.
What tools do I need to assemble a P-Trap?
- Adjustable wrench
- Pipe cutter
- Plumber’s tape
- Slip joint pliers
How do I know if my P-Trap is installed correctly?
Check for leaks at all joints, ensure proper alignment, and verify no sewer gas odors are present.
What are common mistakes in P-Trap installation?
- Over-tightening connections
- Incorrect pipe alignment
- Using the wrong size trap
Is there a required distance between the sink and the P-Trap?
Yes, local codes typically require a distance of 18-24 inches to ensure proper drainage.
Do P-Traps require maintenance?
Regularly check for leaks and clean out any debris to ensure effective function.